Showing posts with label Indian Food. Show all posts

Sunday, April 12, 2015

INDIAN CUISINE: Exotic and Delicious Dessert - Sabudana Kheer

There is no need of travelling far or going to restaurants of certain cuisine to have a dessert of exotic flavors and aromas! Here on the West side of the map of the world, most of the desserts that people prepare nowadays are cakes, small cakes, muffins, fudges etc.; desserts that are quite often based on chocolate, fruits, syrups, baking powders, eggs, gluten flours and in general all kinds of bought powders, aromas, grease etc. that are not always beneficial for our health. Indian culture is not originally familiar with sponge cakes and similar oven- and/or microwave-prepared desserts.

~°~
Indian desserts are referred to as Mithai in northern India. Mithaiya (pl.) are in fact what we consider as "sweets". These sweet dishes, often very simple with just a couple of ingredients, are usually based on milk products and sugar or some other kind of natural sweetener. Back in the time, people could not afford their families rich desserts. Their lifestyles and diet were very simple and so were the dessert recipes. Sweets were, therefore, made with what people already had at home and in such a way their preparation would not take too much of time. Some of the sweets must be eaten fresh while others are made to last for a very long time.

Variation of these sweets are too numerous to be counted. Once you have mastered the original recipe, adding or substituting ingredients becomes a fine, small type of an art. Ingredients which will be rotated in most of the cases are fruits, dried fruits and nuts. There is often no rule and the recipes are easily adapted according to the person's taste buds and preferences! That is the beauty of Indian Mithaiya in contrast to Western desserts in which even one slight change might end up fatal for the result. Mithai which we want to present you today is called as Sabudana Kheer.

Sabudana Kheer - a delicious exotic, tapioca and milk based dessert!

Kheer itself is a dessert which can be compared to what we know as rice pudding. Kheer is milk and rice based dessert with dried fruits, mostly raisins, and nuts, usually cashews and almonds. It also contains spices such as saffron and cardamom. As it was mentioned, the recipe can have many variations; and so you can put in it whichever dried fruit and nuts you prefer (dates, figs, unsalted or sweetened peanuts, walnuts etc).

Sabudana is tapioca, and Sabudana Kheer's recipe is not much different than tapioca pudding recipe. If you know how to to make tapioca pudding, you are already qualified for making this exotic dessert! However, if you have never made this dessert so far, follow these easy tips to make it. What is very important is the ratio of milk, sugar and tapioca which should be equal to 1/2 cup of tapioca and 1/2 cup of sugar for 3 cups of milk. Sugar is, of course, optional in case you do not tolerate it well. In case omitting it, you can add a spoon or two of tapioca more. What is special about this dessert are exotic flavors of dried coconut (coconut flakes), dried fruits and nuts as well as spices such as saffron, cardamom, vanilla etc. Pick the optional ingredients you love the most and enjoy your Sabudana Kheer! We encourage you not to omit coconut flakes :)

Here are the steps to make a perfect Sabudana Kheer!
1° Rinse tapioca pearls - then let them soak for about 20 minutes in a pot.
2° Once the pearls are half transparent, take 3/4 of the water out of the pot and add milk and sugar.
3° Cook on a low or lower medium heat while stirring at the same time! Do so until tapioca pearls become completely transparent. If they have whitish core, they will be "chewy". This will take about 20 minutes but it is worth it! Moreover, it is very important you pay attention the milk does not come to boil. If you see that coming, immediately lower the temperature of the heat.
4° Add coconut flakes, fruits, nuts and spices you picked for this dessert and add them all together around 3-4 minutes before you are done or the dessert achieved desired thickness.

One more thing we want to emphasize is that this dessert is a perfect Ekadashi treat and is very often consumed during fasts in India. Tapioca is also well-known to help with digestive problems such as diarrhea or constipation - it absorbs water but is also jelly-like. Here you can learn more about Ekadashi.

Enjoy! :)
Let us know how it turned out!

Wednesday, April 2, 2014

INDIAN CUISINE: Paratha (Parantha)

Paratha or parantha is Indian flatbread. The most characteristic feature of parathas are layers of the dough - crispy from outside and soft ones inside. This is the reason why it is a bit more difficult to make parathas than rotis or chapatis - it takes some practise to learn how to make the layers and at the same time to be careful that the bread puffs. However, there are a few types of paratha among which each of them goes well with any kind of vegetable dish, lentils, rice, soya chunks or meat. Some will require more skills and practise, some less. Parathas will usually be made fresh right before the meal.
~°~

Paratha is a type of Indian unleavened flatbread. Traditionally parathas will be made with Ghee - however, you can use any oil or butter instead of it. While simple roti/chapati dough is made with only two main ingredients - flour and water - into paratha dough we add some ghee/oil/butter as well. But on the other hand, even if you do not add it into the dough (suppose you are not able to eat or you are avoiding extra grease for some other reason) - parathas will turn out just fine. The key point is not to put grease into the dough but between the layers of the dough. The dough should be soft but firm and not sticky. The amount of the ingredients is not so important - it depends on how much and how big parathas you want to make. Slowly start adding water into the dough (and a few table spoons of grease). When the dough is not sticky anymore and it is soft, let it rest for around 10-15 minutes.

Corn - Wheat Paratha Dough
Corn-wheat Paratha Dough

Layered parathas are the most simple to make - though it takes practise to perfect the technique. If you are making parathas for the first time, give yourself some time. If you have already mastered puffing rotis/chapatis earlier, then this will not be a big problem for you. This layered paratha is meant to be the simplest because the layers are simply made by folding the rolled out dough. First of all, the dough needs to be rolled out in a round shape, just as if you would be making a roti. Then you take a bit of grease, traditionally ghee, and spread it thinly on the rolled out paratha. You fold it once and fold it again that you get a nice little triangular shape. When you have rolled all of your parathas like this, you heat the pan on high or maximum temperature and roll out the triangles. Rolled out layered paratha is then put on the pan. You have to wait a bit, until the bubbles become visible on the surface, and turn it over. Once you have done than, take  maximum one half of tablespoon of grease and gently spread it on the top side of the paratha. Gently press paratha where there are no bubbles. Flip the paratha and do the same thing once again. Paratha should be puffed at this point.

Simple Layered Paratha

Another way of making parathas is a bit more difficult but once it becomes a habit, it goes smoothly. This one is called lachha paratha and it has more than 3 layers. The procedure is the same as simple layered paratha until the folding point. When the grease is thinly spread on rolled out paratha, you sprinkle it with flour and try to spread it evenly with table knife. The other easier option is to have a plate with flour next to you and just dip that side of paratha into it. After that, the paratha has to be folded like a hand fan - folds are made by folding the dough back and forth. This way you should get a layered stick which you stretch a bit and fold it in a spiral, kind of like a snail's house :) when you are done with all parathas, you roll them out and fry them on the pan in the same manner.

Rolled Parathas
Rolled Parathas

At last, there are stuffed parathas. There are many types of stuffing you can use. Mostly they will be mashed vegetable or lentils, sometimes even spices. The stuffing will be like an inside layer itself. the procedure is again the same until the folding part. Instead of folding you will be adding the stuffing in the middle of the rolled out paratha. Cover the stuffing with the rest of the rolled out dough. Once you have done this to all parathas, gently and softly roll them out. Be careful not to break the dough - else the stuffing will come out. Apply grease from both of the sides of the stuffed paratha on the pan in the same way as already described.

Parathas with lentils and fried potatoes

These are the three basic and most common ways of shaping and making parathas. Any flour can be used for the dough as long as it is finely grinded. You can also use harsh corn flour but make sure that at least one third of the dough is wheat flour. If not, the dough will be breaking in dry pieces and it will be difficult, almost impossible, to roll it and make layers. You can also use rice flour if you are gluten intolerant. You can add grease in the dough as well as salt - but it is not compulsory as parathas will turn out just fine. It is the technique that matters the most. The rest can be adjusted up to your preferences and health condition.
Parathas can be eaten as breads along with the other dish, alone with a gravy or sauce or it can be used as a roll, just like tortillas. They can be also made in different shapes - triangular, round, squared etc.

Saturday, March 15, 2014

INDIAN CUISINE : Flatbreads!

If you do not know much about Indian cuisine, you will be surprised to find out that Indians usually do not make nor eat bread and buns as Westerns. Indians have more types of bread and sometimes even more names for each of them. Those which are not complicated to make will be made at home right before the meal - fresh.
~°~

Most of the Indian breads are flatbreads - a flatbread is a type of thin unleavened bread. It basically means this - the dough is made without yeast (naans, for example, will be made with yeast), the bread is made by rolling the dough out into a layer and one bread is kind of equal to one slice of the Western bread. You are not making one whole bread from the dough. By cutting the dough and shaping the smaller parts into balls, you are making "breads." One bread will usually be for one person, just as a slice of bread is. The breads can be smaller or bigger, thinner or thicker, with or without stuffing. It depends on your preferences as well as on the method of making each type of the bread.

The simplest Indian flatbread to make is called roti and/or chapati. The basic ingredients for the dough are flour, a bit of salt and water. Some put a bit of oil into the dough as well, or any kind of other grease like butter or Ghee - clarified butter. These ingredients are basic for making any kind of Indian bread in general. Baking rotis can sometimes be tricky and this is the part where most of the Westerns will freak out because they have to accomplish that the bread puffs! It sounds difficult and unusual but it is not as difficult to achieve it as it seems. Once you have mastered the puffing part, you are literally ready for baking any kind of other Indian flatbread!
A puffed flatbread should look something like this:

Puffed Roti Chapati - Indian Flatbread - Indian Cuisine Food
Puffed Roti/Chapati - Indian Flatbread

The good thing about Indian home-made breads is that you know exactly what are the ingredients and they are additive-free. You can adjust the dough according to what you can eat. For example, if you can not tolerate gluten, you will simply use the gluten-free flour - such as rice flour, corn flour or the mixture of two or more gluten-free flours in case one is more expensive and the other is cheaper. In addition, this is a very good method of saving money on something you eat daily because one kilo of flour costs as much as one bread, while you can make more breads from one kilo of flour. To conclude, the breads will definitely be more healthy AND more fresh than those which you buy in a store.

The dough of each bread can be used in preparations of meals from other cuisines as well. For example, Indian flatbread called naan can also be used as a pizza dough like in Italian cuisine while rotis and parathas are good as flatbreads for making rolls such as for burritos from Mexican-American cuisine.

Creativity is your only limit!

Thursday, February 13, 2014

What is - EKADASHI?

Ekadashi is the 11th day of each half of the month in the Vedic lunar calendar. The word is of Sanskrit origin and it actually means "11". Roughly said, Ekadashi occurs twice a month. Hindus, especially devotees of Lord Krishna, fast on this day.
~°~

The fast itself does not have to be very strict. The key point is to praise the Lord Krishna and devote the day to chanting, praying, reading religious texts and similar acts. The fast is done by avoiding eating grains, beans and anything made from this sort of food - bread, pasta etc. All the fruits (fresh and dried) are allowed along with some vegetables, spices and other things. Therefore, some people would pick to fast on fruits and water, some only on water while those who can - might even go without water. Some people would also avoid grains or any kind of food a day or two before Ekadashi so that there would not be any remains of this particular kind of food in the stomach/guts.

As it was mentioned already - the key point is to praise the Lord Krishna and devote the day to chanting, praying, reading religious texts and similar acts. By doing a fast, a person dedicates more time to that during the day. The fast is like an instrument how to do it rather than just being the purpose to itself. Ekadashi is the day devoted to God and ourselves as well. On this day some might go to temple or local Hare Krishna community and celebrate Ekadashi by singing and chanting, while others do it in silence of their minds in nature or at home.

Of course, being a Krishna devotee is not a "must" for doing Ekadashi. Many people of other religions do it as well and praise God or simply devote the day to themselves - as we are all one God's creation, each of us carries a divine light inside. Those people would rather meditate, do yoga, pray or simply pay more attention to respect other people around themselves and do good deeds than chanting Lord Krishna's name. Being a better person and do good things for a good cause is always right.

Ekadashi starts from midnight and continues the whole day till the sunrise of the day after. There is usually a certain point of time when you should stop the fast by eating a bit of grains. The rest of the day is up to you. It is always good to check a website of your local Hare Krishna community to see the exact date and time of Ekadashi for your time zone. Along with that it is also recommended to plan out the meals a day or two before Ekadashi according to the allowed food.

 Have you ever fasted on Ekadashi?
Let us know about your experience!

Meditation Ekadashi
...thank for your existance


Saturday, January 25, 2014

Ghee - Clarified Butter

Butter is well known on Indian subcontinent for centuries. Even in Vedic era butter used to be brought as a present for gods - it was used in small sacrifices. Today in India, along with butter as we know it, Indian people also use Ghee - clarified butter. 

~°~

Clarified butter is butter melted and boiled on light fire. By doing so the water from butter evaporates and dirt (such as milk fat) in the shape of foam that is gathered on the surface can easily be removed.
Ghee has a higher smoking point. That means it wont burn that easily while cooking so you can use it as oil. In general you can also use it in situations you would use normal butter. Even when making sandwiches.
Fresh clarified butter is in liquid form while at the room temperature it will be solid.

Ghee - Clarified Butter

You can also use Ghee for making Kajal (Kohl)!
Kajal is make up that Indian girls, and some boys, wear since their childhood. It is believed that Kajal made from natural ingredients not only enhances the beauty but is also good for health.
It is also believed that it is good for skin as well. Apparently it makes the skin ligher and according to Ayurveda it heals burns, wound scars, skin marks etc. You can put it directly on your skin or in the form of a cream.

Kajal - Kohl


Thursday, January 2, 2014

Indian Cuisine: SAMOSE

Samose are a famous Asian dish which can be salty or sweet, fried or baked. Although here will be shown the most popular recipe for samose the filling can be adjusted up to your taste. It is a very delicious dish that can be served as a snack. You can prepare them a day earlier and fry them the next day before serving.

~°~

If you are making samose for the first time, give yourself some more time for the preparation. After some time it can be all done in 1 hour. Also, try to follow an original recipe that you find on the internet first and later experiment with the ingredients for the filling you like the most.

As you can already see, one samosa snack consists of 2 parts - pastry and filling.

Samosa - Indian Dish

~ For the pastry you will need:

1 cup all-purpose flour
2 tablespoons vegetable oil

~ For the filling you will need:

2 large potatoes (boiled)
1 onion, chopped
2 green chilies, very finely chopped
3 tablespoons oil
1/2 teaspoon ginger, grated
1/2 teaspoon garlic, crushed
coriander seed
1 tablespoon cilantro, finely chopped
1/2 lemon, juice of
1/2 teaspoon turmeric
1/2 teaspoon garam masala
1/2 teaspoon red chili powder
salt

~ How to do it?

Mix together the flour, oil and salt and sdd a little water, until mixture becomes crumbly. Keep adding water, kneading the mixture till it becomes a soft pliable dough. Cover with a moist cloth and set aside for 20 minutes. Beat dough on a work surface and knead again. Cover and set aside.

FILLING.
Heat 3 tbsp oil. Add ginger, garlic, green chillies and few coriander seeds. Stir fry for 1 minute, add onions and saute till light brown. Add cilantro (fresh coriander), lemon juice, turmeric, red chili, salt and garam masala. Stir fry for 2 minutes. Add potatoes. Stir fry for 2 minutes. Set aside and allow to cool. 

Divide dough into 10 equal portions. Use a rolling pin, roll a piece of dough into a 5" oval. Cut into 2 halves. Run a moist finger along the diameter. Roll around finger to make a cone. Place a tablespoon of the filling into the cone. Seal the third side using a moist finger. Deep fry the samosas on low to medium heat until light brown. Serve with tomato sauce or any chutney you love.

~ Enjoy :)

Source - recipe

Sunday, December 15, 2013

Indian kitchen?

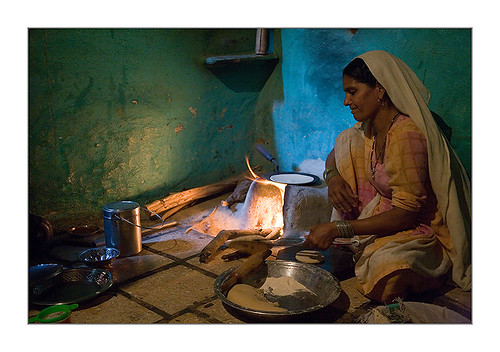
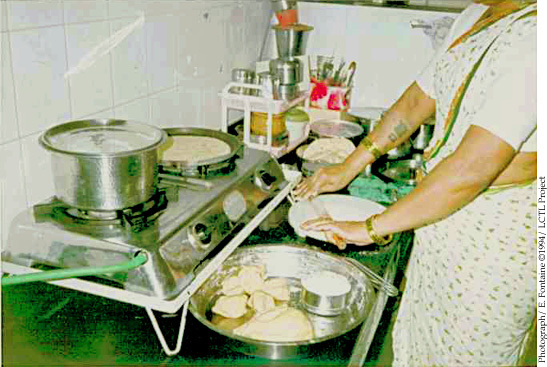
So probably you have noticed Indians do not prepare food in the oven much or bake cakes in the oven. How come? Well, it is simple, their kitchens look a bit different. Here are some pictures of typical Indian kitchens, utensils and thing you can find in their kitchens.
~°~

Indian woman preparing a meal

Indian woman cooking outside

Indian chef

Tandoor
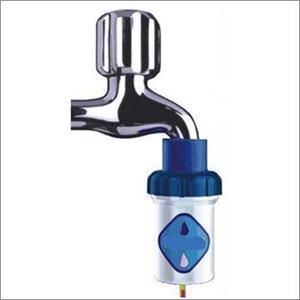
Water purifier
Water purifier

Chakla and belan

Okhli

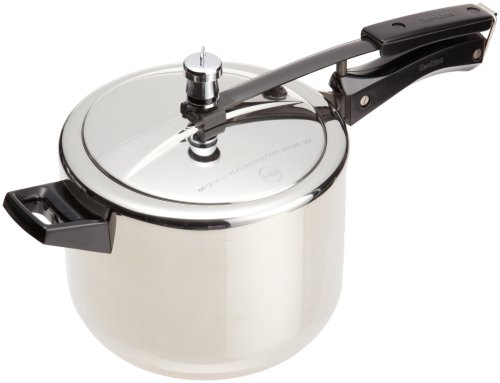
Pressure cooker

Thali plate

Thali plate


Indian Food

Here are some of the most famous dishes of India. From breads to cakes - delicious, mouthwatering and ... SPICY :)

~°~
ROTI
Roti - Chapati

PURI
Puri

PAV BHAJI
Pav Bhaji


SAMOSE
Here is the full Samose recipe - Indian Cuisine: SAMOSE
Samose
Samose

BUTTER CHICKEN
Butter Chicken


EGG CURRY
Egg Curry

KULFI
Kulfi
Kulfi

GULAB JAMUN
Gulab Jamun